Section Overview: Settings
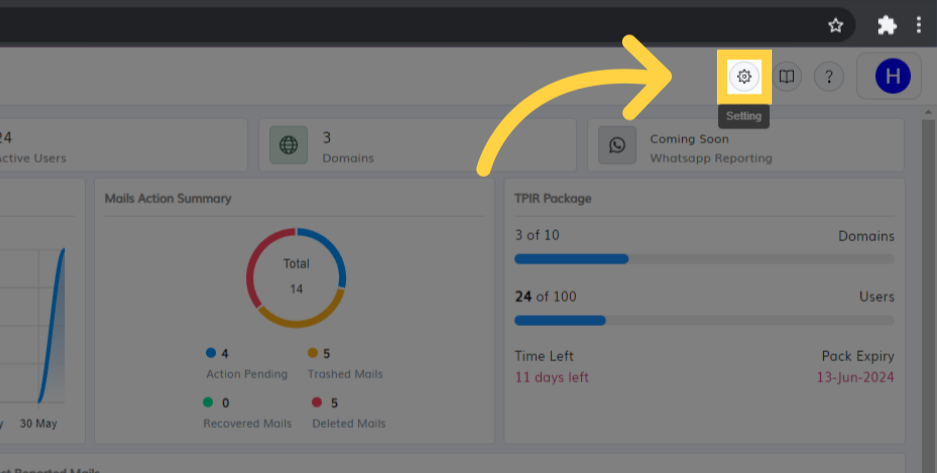
Accessing the settings of the TPIR Dashboard is simple. Users need to log in to their TPIR dashboard at https://tpir.threatcop.com/ and locate the settings icon in the top right corner of the dashboard. This icon provides access to various configuration options and preferences for customizing the dashboard according to user requirements.


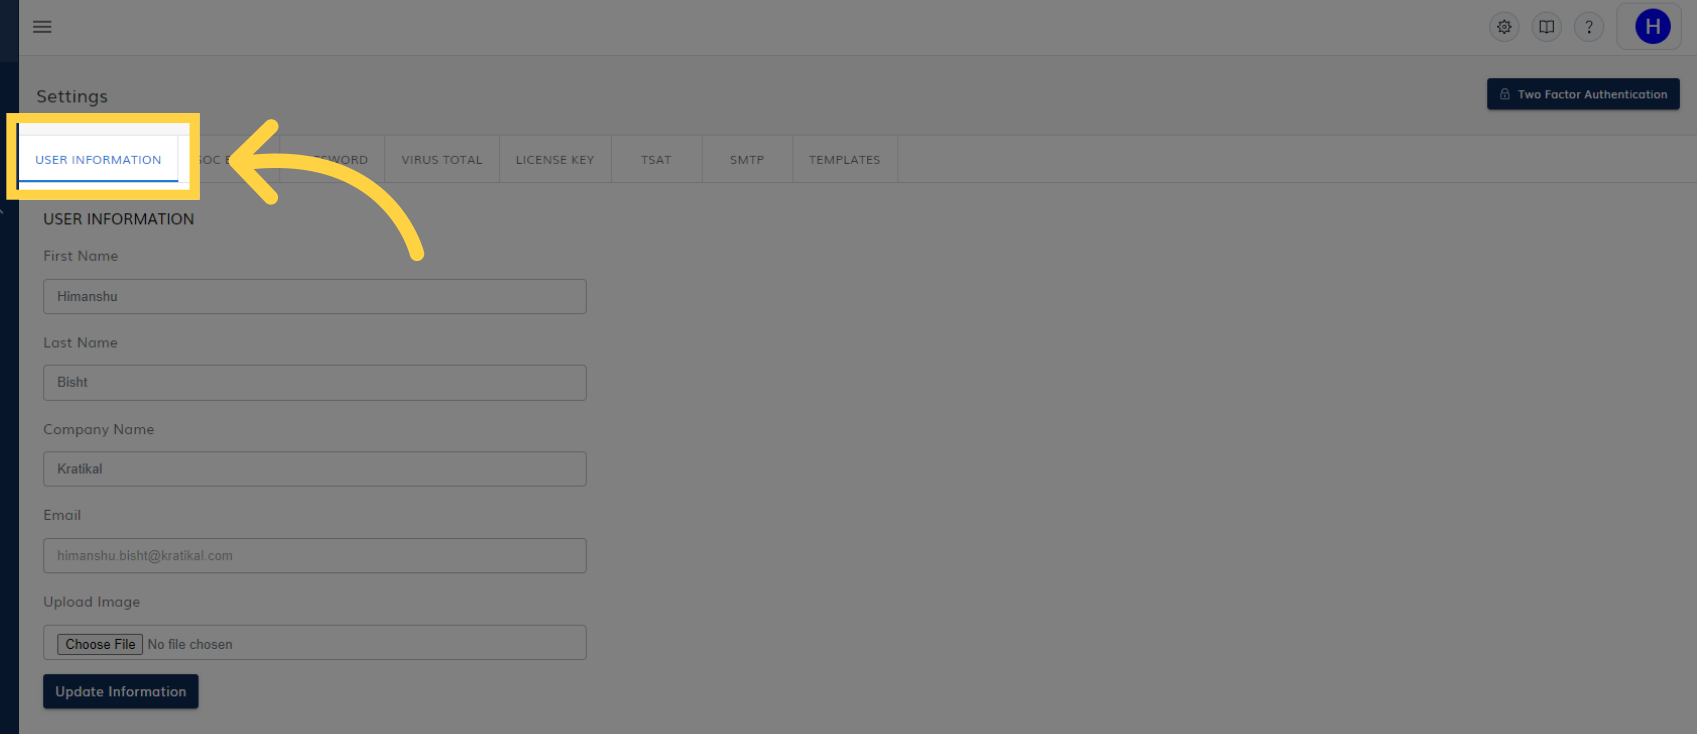
Upon entering the settings tab, users will discover various options available to manage the dashboard according to their preferences. These settings encompass User Information, SOC Email, Password, Virus Total, License Key, TSAT, SMTP, and Templates. Each setting provides users with the ability to customize and configure specific aspects of the dashboard to align with their needs and requirements.
Within the settings console, the initial tab, labeled "User Information," allows for customization of personal and company details. In this section, users can input their first name, last name, and company name. The user's email address is also required. Additionally, to enhance the visual aesthetics of the TPIR dashboard, there's an option to upload a company logo. This personalized touch makes the dashboard more visually appealing and aligned with the company's branding.
The subsequent tab, labeled "SOC Email," is designed to facilitate communication within the Security Operations Center (SOC) team. Here, users can specify the email addresses of SOC team members who should be notified when a user reports an email using the TPIR plugin. This ensures that relevant personnel are promptly informed about reported issues and can take appropriate action.
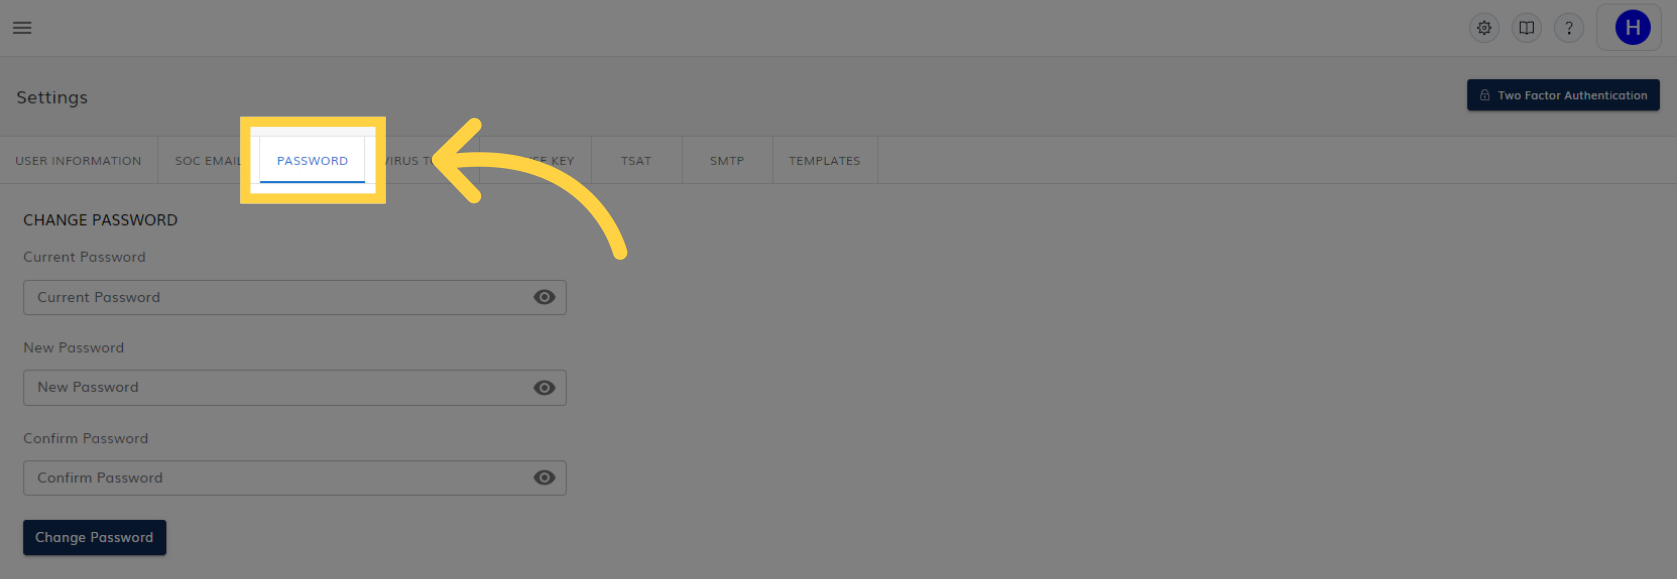
The following tab, labeled "Password," is where users can manage their TPIR dashboard password. This section allows users to reset their password for enhanced security. By resetting their password periodically, users can help protect their account and the sensitive information contained within the TPIR dashboard.
The 'Virus Total' tab, located after the 'Password' tab, enables users to input their Virus Total account's API key. This integration allows the TPIR dashboard to utilize Virus Total's threat intelligence data, enhancing its ability to identify and analyze potential security risks from the reported emails.
Next up is the License key.
The subsequent tab, designated as the "TSAT tab," serves a specific purpose for users with on-premise TSAT dashboard deployments. In this section, users can input the direct link to their TSAT dashboard. Additionally, there's a toggle switch within the TSAT section of the settings that users can activate to enable integration between the two platforms.
Adjacent to the "TSAT" tab lies the "SMTP" tab offering the option to configure a custom SMTP (Simple Mail Transfer Protocol). This enables the system to send emails on behalf of the SOC team to users who have reported emails through the TPIR plugin. By utilizing a custom SMTP, organizations can maintain control over their email communications and ensure seamless integration with their existing infrastructure. To know further about how to enable your custom SMTP you can visit *link*
The Templates tab, is dedicated to managing email notifications. These notifications play a vital role in the email reporting and action process, facilitating communication between users, the SOC team, and other relevant parties. Each stage of the process triggers specific notifications, keeping everyone informed and ensuring a smooth workflow. For a comprehensive guide on customizing the pre-designed templates to align with your unique requirements, visit *link*.
Related Articles
Section Overview: Users
When users visit https://tpir.threatcop.com/, they can find the "Users" section within the Integration tab in the sidebar. This section offers a detailed and comprehensive overview of all users who have been uploaded to the TPIR dashboard, either ...How to Push XML file in Exchange admin panel
To add an XML-based add-in in the Exchange admin center, follow these steps: Log in to the Exchange Admin Center: -Access the Exchange admin center using your admin credentials. Navigate to Add-ins: -Depending on your environment, you can find the ...What is TPIR Mail Analysis?
The TPIR Mail Analysis feature allows users to examine specific emails and take necessary actions based on the findings. It provides comprehensive information about each email, including AI-assisted analysis and various parameters. Users can access ...TPIR Plugin Setup Guide (o365)
To integrate TPIR for multiple users on Microsoft 365 follow the below steps : Step 1. Login into your Microsoft 365 admin center and go to Settings (left-hand panel). Step 2. Now go to Integrated Apps under Settings. OR Go to Search Bar and type ...Outlook Credentials Generation
In this article, we are going to provide you with detailed steps on how to generate the outlook credentials The concerned organization’s admin will log in at https://portal.azure.com/ Go to the App registration under the options of Azure services ( ...