Threatcop learning Management System (TLMS) User Guide
This is a robust platform designed to streamline and enhance the process of training and education. It serves as a centralized hub for organizing, delivering, and tracking various learning materials, courses, and assessments. With user-friendly interfaces, advanced analytics, and collaborative features, TLMS plat- forms empower organizations and educational institutions to create dynamic and engaging learning experiences for their learners.
Click on Dashboard to view all the details related to the TSAT Account.
The Dashboard has all the recently executed campaigns and you can view the campaign results. Click on the desired recent campaign to view it's data.
You can also have a look at our popular content on the dashboard itself.
To run or create a course. Go to Courses. We have a vast library of content and you can pick what ever you like. Please follow the below steps to run a course.
LIBRARY has system courses which are ready to use.
Click on LIBRARY
Click on three dots of a particular course which you want to clone.
Click on Clone to My Courses.
Edit the name of the course because 2 course with the same names can not exist.
Click on Start Cloning.
Click on MY COURSES to see the cloned courses.
You can also find all the
courses created by you here only.
Once the course is cloned or you have created a course in this section then click on three dots on that course to view a few options related to that course inside the My Courses section.
There are a few options available once you click on three dots.
1. Preview
2. Edit Course
3. Run Course
4. Analytics
5. Delete
Click on Preview to see the course preview.
Click on Edit Course to edit the course as per the given screenshots.
Click on COURSE DETAIL. In this tab you can edit the Name of the course, Category, Topic, Language and Image as well. Then click on Go To Next )in the bottom right corner Button to edit the course content.
Here you can edit the course content, videos, etc. by clicking on Edit button.
Here you can upload a video, import a video from Store Library, Google drive, youtube and
vimeo.
Click on Upload to upload the selected/imported video.
Click on Edit inside the Quiz section to edit the Quiz questions.
You can edit the questions directly by clicking on the question you wish to modify. This action will open input fields where you can make changes to the text as shown in the below images.
OR You can import a set of questions from our question Bank. Click on Import from question Bank and select a group of questions.
Select the desired set of questions to use them into your course as shown in the below images.
Click on Select All if you wish to import all the questions from a selected set of questions. You can pick selective questions as well. Then click on Import button ) bottom right corner. Please scroll the page if you can find the button.
Click on Update Course to save all the changes in the course.
RUN CAMPAIGN :
Click on Run Course in order to execute the course for your learners.
Here you are required to use a unique name for your campaign. Configure the basic settings of your course. Such as the user can not skip or forward the video, passing percentage, etc.
Here you can edit the passing percentage for the users to score the minimum
marks to pass the course quiz.
Click on Save Config to save the changes in the campaign course settings.
Select those groups on which you want to run the course.
Click on Select Groups. Here you can see all the Groups/User Groups which you have created already will show up.
Don't know how to create user group. Click the link below :
Click on Select Groups groups on which you want to run the course. Here you have 2 options to select.
1. Distinct User : This represents the default configuration for the campaign, as initially, everyone will receive an email to view the course. However, if you prefer to send the course after making edits to the group, you have that option. The course will now be sent to those who were not previously present in the group.
Click on dd/mm/yyyy to set the expiration date for the campaign.
Click on Schedule to schedule the campaign.
Click on Select date and time option where a calendar will pop up.
Select the date and time.
Click on Send to schedule it after selecting the date and time.
Click on Send Now button to execute the campaign right now.
And this is how the campaign can be executed successfully.
VIEW CAMPAIGN ANALYTICS :
Click
on Analytics
Click on “Click To View” on the course card.
For Example - Click
on 75 - 100
You can now view users whose
progress percentage falls within the range of 07 to 166.
Upon Clicking on 75 - 100, you will be able to see the data of those users who have scored within the range 75-100.
 Click On Campaigns
And
then click on a campaign for which you want to see the analytics.
Click on View button of a
particular campaign to view the Quiz details.
Click On Download
To download the Quiz results in csv format for
all the users present in the campaign.
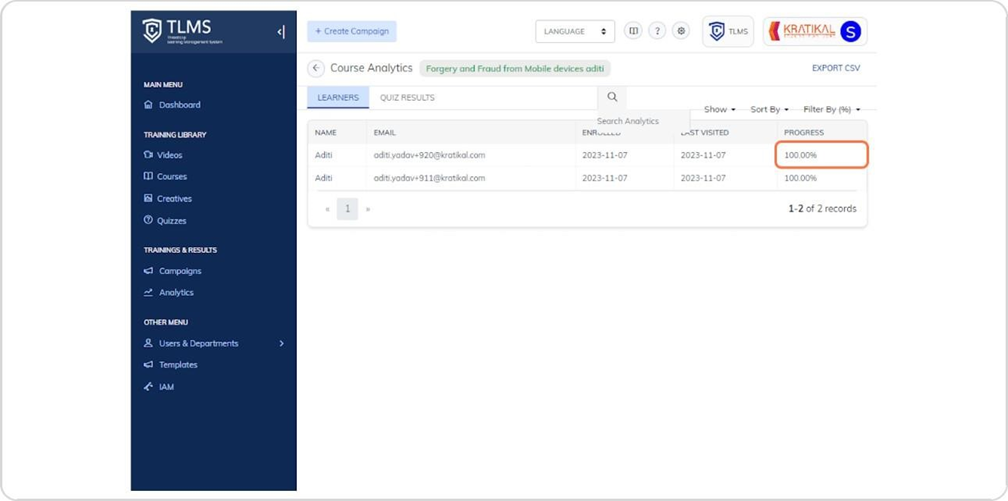
Click on View (specific for all the details)
Filter By Percentage (%)
On this screen, you will be able
to see Learners Analytics. You can also filter the data by percentage.
Related Articles
TLMS Campaigns Section: A User Guide
Welcome to the Campaigns section within Threatcop Learning Management System (TLMS). This guide aims to assist you in navigating this section effectively to manage and monitor your training campaigns. Let's delve into the sub-sections and the ...Creating a Campaign in TLMS: A Step-by-Step Guide
Campaigns in Threatcop Learning Management System (TLMS) serve as strategic initiatives to deliver training content and engage learners effectively. Here's how you can create a campaign seamlessly: Access Campaign Management Navigate to Campaigns: ...User and Groups Section in TLMS
The "Users" tab within the "Users and Groups" section provides an interface for accessing all users uploaded onto the TLMS portal. User data is presented in a tabular format, organized according to specified headers such as email, name, department, ...SOP: Managing User Blocking and Unblocking via Active Directory (AD) in TLMS
SOP: User Blocking via Active Directory (AD) in TLMS Overview This SOP outlines the steps for administrators to block or unblock learners in the Threatcop Learning Management System (TLMS) via integration with Active Directory (Microsoft Azure AD / ...IAM User in TLMS
IAM refers to Identity and Access Management. This feature enables administrators to manage user identities and control their access to resources within the tool's ecosystem. With IAM, administrators can create, modify, and delete user accounts, ...